Showing posts with label Preserves. Show all posts

Thursday, August 24, 2017

Smallholding plans

As a smallholder, you are presented with a wide variety of animals and breeds which you could keep with a view to using them for food; cattle, sheep, ducks, bees, geese, chickens, pigs, goats, other foul, the list goes on. You also need to consider the cost vs. payback; the total value of looking after the animal, not just in terms of food, but in terms of the experience of looking after them. You also want to work out what you want to use them for. Do you want chickens for eggs or meat, as this will dictate to some degree which breeds to buy. Cattle/goats/sheep for meat or milk, or both? 

Then you will have a better idea of the infrastructure you will need to get in place; what housing is appropriate, what food they should be provided with, how much room they will need, what type of fencing and protection you must provide, how much of your time will be required and what the cost will be for all this. You will also need to consider the cost of the equipment for any of the specialist plans you have; milking kit, cheese-making kit, honey extraction, maybe a smoker and curing kit for meat, equipment for making mead - the options are endless and the list (and cost) grow fast. 

Even  a simple plot with fruit and vegetables, you can find your plans to make lots of jams and preserves will require the right equipment, especially if you plan to make enough to sell them in any volume. It takes planning and preparation so that when the produce is ready, you are too. Fruit will not stay perfectly ripe for long whilst you run around trying to buy sugar and vinegars and preserving pans, muslin and jars and labels and whatever else you need.

It is really easy to get carried away and spend too much money too quickly on plans you cannot possibly execute with the time you have. Don't have your enthusiasm dampened, but do consider how much time a lot of these things take, their cost over time too, and how you probably will need to spend some time at work and with your family too! Take small steps and try to master one thing at a time, otherwise it may be that you find you take on too much - being a smallholder is supposed to release stress, not create more!

Record keeping is essential too... write down your recipes, journal your experiences with your plot, and record the health and growth of your animals. Not only will this give you something to refer back to, but it will be useful in many areas where the authorities expect you to keep records of your activities so that the spread of disease in your area is reduced.

As with most new ventures, get some advice. Try to find a mentor or a neighbour who will help with any 'stupid' questions (there are no stupid questions, only stupid people too proud to ask them). Getting involved with a local association is also a good idea - and you will find there are lots to choose from. You will certainly have a local beekeeping association, a horticultural society, a club for foul fanciers and many more. Go along to meet them, listen to the talks they will invariably provide and chat to the other members who will love to share with you their successes and failures. Everything is much harder (and expensive) if you insist on learning all the lessons yourself.

Friday, July 21, 2017

Ginger Beer

This year I have been experimenting with ginger beer production. Ginger beer is one of my favourite alcoholic drinks. I don't drink lager or beer, or even much wine. I have therefore tried many of the ginger beers on the market.
  • Crabbies is maybe the most popular in the UK and is a good alternative to home-brew. They have many flavours, but the traditional one is the best I think. Even so, there are some good, lesser known brands on the market worth seeking out. Most supermarkets sell Crabbies. If you can get it, try the special reserve Crabbies Black.
  • Ginger Grouse is a ginger beer made by the whiskey makers, Famous Grouse. It has a great flavour as they put a shot of grouse whiskey in it. I think probably less than a shot, but it does make for a very nice, if slightly sweet, ginger beer. Sainburys and Morrisons sell it usually.
  • Hawkes are a small London based brewery with a growing reputation. It can be harder to get hold of, but it is really worth the trouble. Hawkes started with their ginger beer and make cider now too. But their ginger beer is my number one favourite on the market at this time.
  • Wychwood produce a GingerBeard variety which is ok. It is more beery than most, although still quite sweet. I was not a big fan to be honest and only tried it once. Their website is brilliant though and Hobgoblin is great to use to cook venison and beef with.
Some more reviews of a wider variety here and here

But commercially sold ginger beer is not cheap at usually £3.50 for a 500cl bottle, and over a fiver in a pub. As usual, it is cheaper to make your own, and it is a lot of fun to do so. 

This is how you can make your own superb ginger beer and you get 7 litres for less than £10. Here is what you will need... but note that this takes time, about three weeks in total. And it is best to make it when it is warm (at least 15c), as it is much happier and develops better in warm weather.

A big chunk of ginger, unpeeled, but grated roughly.
The juice of 2 lemons.
A chilli pepper of your own choice. I use a Bulgarian carrot chilli, but choose one that suits your taste. Try half with your first batch and work up from there. Chop it nice and fine.
A 2 kg bag of granulated sugar. I use about 1.5kg of it. If you use all 2kg it will be very alchoholic or sweet, depending when you start to drink it (see details below). Its up to you. I did warn you.
A 7g sachet of champagne yeast. Easy to buy on eBay or a local hardware shop that sells wine-making kits. Don't use bread yeast or even wine yeast; they will work but not anywhere near as well.
5 x 2 litre plastic bottles with screw tops. Ones that have had fizzy pop/soda in them. Clean them out and rip the labels off. Do not use glass bottles. 
A big glass jar like the one in the picture here.

Stage One
The first thing to do is take the sachet of yeast and put it in the jar. Then add about a mug and a half of warm, but previously boiled water to the yeast to get it going. Stir in well and it will start to froth a little bit. If the water is too cold it will not come alive, too hot it will die. So be careful. Body temperature is about right. Add a big tablespoon of sugar and stir until it has dissolved. Leave it for about half an hour. Then add the grated ginger, the lemon juice and the chilli. Give it all a good stir. Cover the jar with a dry tea towel, held on with an elastic band. Leave it somewhere warm for a day.

Next day, take the towel off. Give it another big tablespoon of sugar, stir until dissolved, replace the towel and elastic. It should look like the picture here. Repeat this for about 7 to 10 days. By then you should have a good frothy ginger beer plant! This is a live organism, feeding on the heat and the sugar. Feel free to name it if you wish. 

Stage Two
Get a big saucepan that can take 5 or 6 litres of water. Fill a couple of inches from the top; I aim for about 6 litres in my 7 litre pan. Bring the water to a gentle simmer and then add as much sugar as you want. I use 1.5kg for a strong, but not super strong beer. Stir in until the water is clear as this shows the sugar has completely dissolved. Now let it cool.

Once cooled down to room temperature, use a funnel to fill your plastic bottles with about 1.5 litres each of the sugar solution. Strain the ginger beer plant through some muslin draped over a steel strainer. Feel free to squeeze the last drop out of the ginger mush using your hands (clean hands, people!).

Divide the ginger beer plant solution across the bottles evenly, using the funnel. Take your time and made sure it is as even as you can make it. This is not an exact science, so don't worry too much. Screw the tops tight on each bottle and put somewhere warm and safe.

Safe? First time I made this, two of the bottles exploded. This is volatile stuff and you do need to be careful. The warmer it is, the faster the yeast will eat away at that sugar and create natural carbonation, and the more pressure on those plastic bottles. I recommend releasing some of the carbonation every day, to be safe. If you miss a day or two, it will be ok probably, but leave it a week and those bottles will let you know about it. I now put my bottles in an old clean plastic dustbin with the lid on, and have it outside, just to be safe. Of course, this means I can only make it when the weather is warm, but my long-suffering wife does not want to have to wash sugary ginger beer off the ceiling again and I cannot blame her!

Stage Three
So you have done all the hard work. You have been gently releasing some of the gas from the bottles every day or two. After at least a week, you can try the beer. Taste it and see what you think. If it is ok, drink up! If it is too sweet (which is likely this early), then leave it a couple of days and try it again. The yeast will keep eating that sugar, making a less sweet but more alcoholic drink. Once it is right for you, put it in the fridge so that the yeast stops eating the sugar (or at least it slows down dramatically) and you can drink it! You should try to finish it within a month, as this is naturally carbonated and therefore will go flat over time. 

Best to drink it cold and note it is normal to find there will be a little sediment in the bottom of the bottles; this won't hurt you, but you can pour away the final inch if you prefer, like me, not to drink it.

Saturday, July 02, 2016

Pumpkins

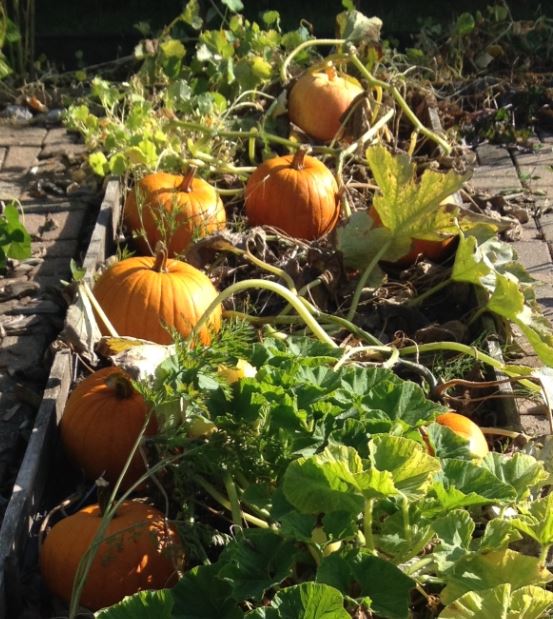
I grow pumpkins every year; they are easy to grow, fun to carve, flexible to cook and tasty to eat. They are one of those great vegetables that work well in sweet and savory dishes. In this post I wanted to share some of my regular pumpkin related recipes. But first...

Growing Pumpkins


Growing from seed is easy; you can use seeds you collected and dried from the previous year if you have them. Use good potting compost with a couple of seeds in each pot. Seed in a normal small pot so that the plant can develop to a fair size before going into the ground. Germinate in the greenhouse and even in the UK they will come through without any additional heating. Transplant to outside in their growing position when there are at least 5 adult leaves on the plant and the roots are pushing through the base of the pot. Dig a much bigger hole than the pot, fill with as much high nutrient compost as you can as these plants are REALLY greedy. I also add chicken manure as this is excellent for pumpkins. Water in generously and protect from any threat of frost. If you want massive pumpkins, only allow one fruit per plant; when you get a fruit in a convenient place on the plant, cut out all the others, put some straw beneath the fruit and keep an eye on the plant from that time on to make sure no other fruits are set. You can feed with tomato feed / seaweed extract, but I just give mine a top up of chicken manure on a regular basis; they love it.

Picking and Carving

Pick your pumpkin when the whole fruit is coloured fully and the plant starts to die and dry out. Cut the stalk cleanly at least 10cm/3in from the fruit if possible, and this helps to keep rot at bay. You can leave the pumpkin in this state, somewhere dry and airy, for months (I have cut pumpkins in October and kept them 6 months with no issues). You should check stored pumpkins weekly and remove any that show signs of rot otherwise it will spread to the others. 

Carving pumpkins is something I really enjoy doing. I like the macabre and this is a fun way to use a plant's outer shell before putting it on the compost. There are lots of good designs on the internet as well as tips on how to carve. My advice is to use very sharp knives and a base that will not let the pumpkins slide about; it is very easy to cut yourself handling a big and slippery fruit. Cut the top of the pumpkin head first, giving a nice side area at the top; don't cut too close to the stem. 


Try to cut at an angle so that when you want to replace the top it does not just fall back in. Use a tablespoon to drag out all the seeds (keep some for next years seeds and the rest can be roasted in oil and salt as a snack). The rest of the stringy innards I give to th chickens - they love them! Then scrape out the fleshy inner layer of the pumkins; it will come out well and this is ideal for making pumpkin marmalade. Now you should have a pumpkin ready to carve. Set the lid to one side and get some long and sharp knives out. Serrated ones are ok to the main work, but you will need a sharp knife for the detail. Then carve and use your imagination! I have some of mine shown here to give you some ideas.     
Cooking Pumpkins 
There are a number of things I like to do with the inevitable glut of pumpkins I end up with. The simplest is roasting slices of pumpkin in the oven with garlic, chilli and pepper; it's great with a roast as an unusual side dish. 

Pumpkin pie is a bit more complicated and takes a lot more preperation, but if you grow your own pumpkins, it is something you REALLY have to try at least once. You will then find out why the yanks love their pumpkin pie so much (and they usually use that tinned stuff; fresh it is even better). It tastes a lot like what we would call a custard tart, but it has a subtle pumpkin taste at the same time, that sweetness you get from pumpkin comes through so well in them. Here is a good recipe for you to try, from Jamie Oliver. Just substitute his butternut squash with pumpkin.

Pumpkin soup is another good use for that pumpkin flesh, once you have it all processed. There are loads of great recipies for pumpkin soup out there, but I would recommend this one from Raymond Blanc; he nails it by keeping it simple and not being too fancy with the flavours. I would be tempted to add a garlic clove or two and a chopped chilli too though... as I cannot help but change all recipes I try!

Finally, the one that always gets the quizzical looks, pumpkin marmalade. Try this recipe:

Pumpkin Marmalade
    1kg pumpkin or squash - weighed after removing skin and seeds!
    1kg granulated jam sugar
    2 oranges

    2 lemons
    250ml water

Using a spoon, carve the flesh out from inside the pumpkin in long thin strips
Weigh so you get the full 1kg, then mix with the jam sugar in a large bowl.
Cut the oranges and lemons into halves lengthways and then slice those thinly with a sharp knife. 
Put the oranges/lemons and water in a large saucepan and bring to the boil. 
Add the pumpkin and sugar and bring gently to the boil, stirring to dissolve the sugar. 
Boil until the mixture is thick and syrupy and has met setting point - about 30 minutes. 
Pour into sterilized jars and seal.